Logo

Here you can find all the information for the classes each week! 
Select the class your child is in to see all the posts so far for your class!


Sand 
& Sea
1710386023667.png
Pink 
Piggies
1720644707823.png
Blue
Bugs
1710465964618.png
Yellow
Arrows1710465964564.png
Orange
Roots

1710465964512.png


Bridge

bridge.png

Green Turtle Shells #15

Wednesday, May 14, 2025 | Green Turtle Shells Lessons

2nd_year_header.jpgred_balloons_parent_note_heading-1.gif

Lesson #15


Thank you so much for attending Station Day! I hope you realize just how much your child has learned this semester. I also hope you were able to see some things that can be worked on over Christmas break. I hope the kids enjoy and use the Christmas songbook they received!


As the name has implied, this semester has been a little slow (like a turtle) purposely to help the children be able to really build a good foundation that will be so important in the next semesters. Yellow Arrows will feel like we are flying through new material (pun intended!), but since we have built a strong foundation, it will be a lot of fun!


Let's Play Music requires all teachers to have their families complete surveys at the end of each semester. If you didn't fill it out on Station Day, please fill it out now! Here's the link: Green Turtle Shells Parent Evaluation 


A little bit of relaxed daily practice over the break will keep the skills taught over the semester fresh and honed. By Yellow Arrows they should be able to recognize and play all chords in RH with fairly quick and smooth transitions. 


The Christmas Break Challenge is completely optional, but I hope you will help your child keep their skills up over the break! (I put it on the download portal, in case you happen to misplace it!)


Classes begin the first full week of January, same day/time. Lesson #1 of Yellow Arrows is also a Parent Day! Please look carefully at your class calendar in the student portal. (If you still can't access that, please let me know!) I might have a few random weeks I'm taking off, so please be aware of that when importing your calendar to your phones!


Please begin listening to the Yellow Arrows soundtrack! We have a lot of fun songs coming up!


Celebrate Connection      
A few ideas to bring playfulness to practice time!

  • Pull out the bells from last year and notice how fun it is to play some of the Green Turtle songs on the bells.
  • Any chance you get, have visitors listen to your child play his/her favorite song at the piano and applaud generously! As a family, sing along with the holiday songs.
  • Can you collaborate with your child at the piano, a parent duet, someone on the Let's Play Music bells from last year and someone else playing jingle bells or simply singing along? THIS is joy for your child when it is done with emotional safety and celebration!


Holiday Ensemble

Fun ways to incorporate the entire family with a Holiday Sing & Play-a-Long!      

  • Student/parent plays chords while everyone sings along. 
  • Play chords an octave higher or lower to change the timbre of the song.
  • Play as a duet, trio, or quartet. Someone plays melody, others play chords on piano. All Sing!
  • Play "Silent Night" p. 18-19 with broken chords. Play each note of the chord separately: Do-Mi-Sol, Do-Fa-La, Ti-Re-Sol. Invite someone else to play the melody an octave higher.
  • Invite younger siblings to play rhythm instruments to add variety while piano is playing: jingle bells, tambourines, drums, etc.
  • If anyone in your family or friend circle plays any other instruments like guitar, ukulele, violin, cello, etc., have them play along with your child! It is completely exhilarating to have these fun jam sessions!
  • Wear a costume while you play.


Be sure to go through the Christmas Break Worksheet! (It's in the Student Download Portal if you lose your printed copy!) Try to do 1-2 activities each day. I've added a fun version of Deck the Halls piano music to your student's download portal to add variety to daily practice and spread Holiday Cheer! 


If you haven't bought the Student Magnet Board and 2nd year Student Magnet Set, consider surprising your musician with these as a gift. They are a great tactile learning tool for reviewing skills and concepts learned in music class.


Here is a link to all the skills videos as well as the link to be able to purchase a class video to make up for a missed class. (tap or scan)


Green Turtle Shells #14

Thursday, May 1, 2025 | Green Turtle Shells Lessons

2nd_year_header.jpgred_balloons_parent_note_heading-1.gif

Lesson #14


Next week is STATION DAY WITH PARENTS! 

This is a wonderful opportunity for your children to show you just how much they have learned during our Green Turtle Shells semester! This is the highlight of the semester, so PLEASE be sure to come enjoy it with them! 


Here's how it will work:

I will have 10 different stations that you and your child rotate through. You can plan to spend about 3-5 minutes at each station and can go in any order. You will be given a checklist to help you go to all the stations. One of the stations is a personal chat with me, and your child will have the opportunity to play their favorite song on my nice piano! I will give out prizes, presents, and a Christmas Break Challenge worksheet (totally optional) that will help your child not get rusty over the break!


Moms, bring your phones and kids wear your LPM shirts! (One of our stations is a "photo booth"!)


Celebrate Connection    
A few ideas to bring playfulness to practice time!

  • Play at lightning speed!
  • Video record (or voice record) a song and send to your LPM teacher! Can you see how much you have accomplished this semester?!
  • Sing along with a Russian accent.


Chord Transitions
Mom, did you know I can play my chords with my eyes shut? The goal is to have their eyes on the music while they are playing as much as possible, with only quick glances at their fingers. With their favorite song, invite them to memorize it and "see" the chords in their minds while they play with their eyes closed.
     
Holiday Songs
The holiday songs in the back of the songbook are great practice to reinforce chord transitions while being entertaining for your student and family. These songs will add cheer to the holidays and festivities and they will help solidify the transition between ALL of the chords in the right hand before we begin Yellow Arrows. Jingle away!


With the holidays approaching here is a Gift Buying Guide  for your budding musician! Consider a gift for your child that will help them in their musical learning. Work on sight reading on the tone bells with the 8 note songbook and 8 note songbook - Christmas edition. Make up your own music using the 8 note PlayPipes. Or reward your musician with a cute sticker from the 2nd Year Sticker Pack.


Green Turtle Shells #13

Thursday, May 1, 2025 | Green Turtle Shells Lessons

2nd_year_header.jpgred_balloons_parent_note_heading-1.gif

Lesson #13


Thank you, parents, for coming to class this week! You are an integral part of your child's music education!
        
If you are paying monthly, final tuition is due this week.


Just so you know, Station Day is coming up on Lesson 15. That is also a parent day! A circuit of musical stations will be set up for the kids to rotate through. Each station will review the skills and concepts taught in class. One of the stations will be an 'interview' with me to show you how much your student has accomplished this fall!
        
Just a sneak peak at some of the musical skills and concepts that have been taught during Green Turtle Shells:
        
Skills:

  1. Keyboard posture, hand & finger placement
  2. Clapping & counting 4 count rhythms using rhythm cards
  3. Playing steps and skips from notation
  4. Playing primary chords with RH without looking at hand
  5. Playing intervals of a 2nd, 3rd, & 4th
  6. Playing individual fingers (SFMRD)


Concepts:   

  1. Identifying middle C
  2. Identifying C & F by playing on keyboard
  3. Demonstrates knowledge of finger numbers
  4. Identifying bug rhythms
  5. Distinguishing steps & skips on staff
  6. Identifying primary chords by notation
  7. Identifying intervals by notation
  8. Identifying melodic patterns by notation


Celebrate Connection        
A few ideas to bring playfulness to practice time!

  • Make up a song for 5 minutes at the beginning or end of practice time
  • Have a digital piano or keyboard at home? Change the "voice" for every song you play.
  • After you've finished all your songs, roll a die and have chocolate chips, raisins, tiny marshmallows, etc. according to the number rolled.


Blue Sky   
Every time the word 
BLUE is said in this song we play a Blue Chord. Can you make up your own song with the RedBlue, and Yellow Chord? Every time you or your child sings the color, play the corresponding chord! Check for correct fingerings!    
        
Primary Chord Transitions   
Transitioning between the primary chords should now be somewhat mastered by the RH. Enjoy playing “The Fabulous 5”: a fun game to help your student reinforce chord transitions! Invite your student to play the red and blue chord 5 times back and forth, back and forth (or the red to yellow whatever they need the most to work on.) The only catch is it has to be perfect! No mistakes whatsoever. If they mess up they get to start over. Once they can do this 5 times in a row perfectly, they get a HIGH 5 from you with oodles of fabulous praise!


REMINDER: It is crucial that your child is using correct finger numbers on the chords. The numbers next to the chords in the book are the ones to use WITHOUT EXCEPTION!


Bubble Hands   
This is an invaluable exercise. It reviews finger numbers, and strengthens fingers as well as promotes independent finger movement. Remember that as the children play chords and single notes, they most likely will not be able to keep a bubble hand. This is the ideal – the goal to work toward. As long as the child can form bubble hand in C position, we are on the path toward the goal.


Bonus Songs   
The appendix of the student songbook contains Frosty the Snowman and Silent Night. We won't play these in class at all, but once the chord transitions are mastered, these songs are so fun and easy to play. They are a great review over the holidays.


Brown Jug   
The Brown Jug game is another fun activity to play at home with a parent or whole family. You just need a playground ball and a little bit of room to roll and catch. It is easier at first to chant "roll, catch" and then begin the song. This is a great way to emphasize how the hands and body must keep the beat while making music! The kids have to be able to predict how hard to roll the ball so that it reaches the person on the beat. This same skill is required when playing a chord on the beat because they have to predict when to lift their hand so that it comes back down right on time.   

Can't Bug Me: Rhythm Ensemble   
The games we play with our percussion instruments help us practice sight reading rhythms, but just as importantly, they help us practice ensemble skills. It takes practice to come in all together, to keep a steady beat internally to stay together, to keep up with the group even when we make mistakes, and to listen to each other to sound like one. WOW!


Harmony Happenings
Our journey to learn harmony started last year singing a repeating pattern alongside a melody (Ding dong in Hear How the Bells). Then we sang in a round (3 Blind Mice). This year we’ve worked on a counter melody or two melodies sung on top of each other (Horsey Horsey). Then we introduced a 4-part counter melody (Solfege Seafriends). This week we sang Solfege Seafriends in a true canon, which is like singing 4 different melodies in a round. It's pretty tricky, but such a good exercise! Enjoy these arrangements of the famous Pachelbel’s Canon on piano and with a string ensemble.


Here is a link to all the skills videos as well as the link to be able to purchase a class video to make up for a missed class. (tap or scan)


Green Turtle Shells #12

Thursday, May 1, 2025 | Green Turtle Shells Lessons

2nd_year_header.jpgred_balloons_parent_note_heading-1.gif

Lesson #12


Next week parents attend and tuition is due for those making monthly payments(Last one this semester!) 


We have been working hard on the transition between the red and blue chords. Please help your child practice if they are struggling with that at all! Our goal is to be able to play these chords without needing to think about it at all (eventually doing it with eyes closed). Don't forget, we use the same fingers for red and blue chords (1-3-5), and our thumb is the anchor so it doesn't move at all!


Celebrate Connection    
A few ideas to bring playfulness to practice time!

  • Set a stopwatch on a parent's phone and time how long it takes to get through a song with perfect, even rhythm, and chords.
  • Put on a concert for stuffed animals.
  • Sing along with a Spanish accent.


Mystery Bug
We played a new rhythm game called Mystery Bug. 3 separate rhythm cards are laid out on the 1st, 2nd, and 4th beat. The 3rd beat is empty (turned over) and is the Mystery Bug. The entire 4 count measure is played and the students identified which rhythm (bug) was missing on the 3rd beat. Then we all counted and played the entire 4 count measure. You can play a variation of this at home by clapping different bugs and inviting your child to clap AND say what bug they heard. Ear training, rhythm training and internalizing the steady beat is happening all at once!


Brown Jug
The Brown Jug game is another fun activity to play at home with a parent or whole family. You just need a playground ball and a little bit of room to roll and catch. It is easier at first to chant "roll, catch" and then begin the song. This is a great way to emphasize how the hands and body must keep the beat while making music.
     
Echo Edna
This week Echo Edna placed various patterns of steps and skips on the board to sight read. She invited us to look at the board and think of two questions before we played the pattern. 1) Is it a step or skip? AND 2) Does it go up or down? Walking through both of these steps will help in all sight reading as well as the theory assignment this week.


 And if you have the Student Magnet Board and 2nd year Student Magnet Set, you can build the baby steps and skips from the homework on the board to make the homework more tactile.


With Thanksgiving just behind us, we can find and play the RedBlue and Yellow chords in 5 Fat Turkeys from last year!


Green Turtle Shells #11

Thursday, May 1, 2025 | Green Turtle Shells Lessons

2nd_year_header.jpgred_balloons_parent_note_heading-1.gif

Lesson #11


Placement of all 9 stickers!

We learned the Blue Chord this week. Please place the Blue Chord Stickers on your keyboard or piano on the notes C-F-A.

It is VERY important that your child is using fingers 1-3-5 to play the Blue Chord! The thumb is an anchor (glued) on Middle C and the rest of the hand shifts up a baby step.

In class we colored the chords in Primary Chord Song and Blue Sky to help distinguish the notation of each chord. (Please help them finish coloring them at home if they didn't finish in class. The notes don't need to be filled in perfectly, just the right colors so they can be identified quickly.) Please be sure to have your child practice playing these songs to get confident in the chord changes. We want them to be able to do it with their eyes closed in a few weeks!


Celebrate Connection   
A few ideas to bring playfulness to practice time!

  • Play a duet with your parent. Place your hands an octave higher or lower.
  • Play your song as *piano* (quiet) as you can.
  • Balance an object on your head while you play.


Turtle Shells  
We will continue to reinforce to your Green Turtle Shell that intervals can show up anywhere on the staff and be played anywhere on the keyboard! Have fun playing an interval game with any two objects by creating an interval and asking your child what it is and then inviting them to play it on the keyboard. Ideas of objects to use: coins, counters, erasers, cereal, candies, Legos, rocks, etc.


 You can reinforce building "turtle shell" intervals all over the staff by making intervals with black notes on the Student Magnet Board.
    
Echo Edna
Echo Edna gave each child their own 'secret code' (using steps and skips) to ‘decipher’ (sight read) on the magnet board. We used our laser beam eyes to solve the code while playing it on the keyboards at the same time!


Now that we are more comfortable with keyboard geography, hand position, how to build chords notated and on the piano, we are ready to keep our eyes on the book and not look down at our fingers while we play each of the songs in the songbook! We’ve already introduced Laser Beam Eyes. Here are some other fun ways to keep our eyes on the book while we practice! Don’t forget, parents, to follow the notes with your finger and sing along with your child!
    
Fill in any of the ideas below with the musical focus of choice, whatever needs a little more practice. Ideas include: redblue or yellow chord, specific intervals, different melodic patterns, specific notes, Middle C’s, rat-tat-tats, steps or skips, different bugs (slug, beetle), etc.
    
1. Keep your eye on the (rat-tat-tats).
2. (Insert Child’s Name), time to turn on your Laser Beam Eyes while we play Blue Sky!
3. Freeze Ray the Middle C’s with your freeze vision!
4. I’ve got my eye on (the steps in Echo Edna)!
5. I’m watching you (Yellow Chords). Always watching!


Green Turtle Shells #10

Wednesday, April 30, 2025 | Green Turtle Shells Lessons

2nd_year_header.jpgred_balloons_parent_note_heading-1.gif

Lesson #10


The students are mastering the fingering placement for the yellow chord and gaining confidence as they continue to have successful experiences in class as well as at home.
     
Blue Chord will be taught next week. This will be so much easier for the children if they are good at the 
red and yellow chords already! Please let me know if your child is struggling with this. I'd love to help!    
     
Celebrate Connection    
A few ideas to bring playfulness to practice time!

  • Play with the practice tracks on your album.
  • Play and sing dramatically and try not to laugh.
  • Sing your song in a grandpa voice.


Red-Yellow Chord Transitions
Remember when playing songs with chord transitions, it's important that the whole hand NOT lift completely off the keyboard between chords. Students must then search to find out where it should land! Instead, remind your child for the red to yellow transition, ONLY the thumb should slide down one white key and they'll be using fingers 1-2-5.
     
Bunny’s Birdhouse
The rat tat tats in Bunny's Birdhouse helps with independent finger movement, in which one finger alone must press down to play melody. It is important that the other fingers NOT lift way, way up off the keys (fly-aways!). Try to play with each finger gently staying on its key, so that the hand is always in C position.
     
Also while practicing the rat tat tats, the top note is a G which is on the 2nd line. When practicing you can sing 2nd line, middle C, 2nd line again OR 5-5-5, 1-1-1, 5-5-5-5-5. Or Sol-Sol-Sol, Do-Do-Do, Sol-Sol-Sol-Sol-Sol OR Number 5, Number 1, Number 5 Again! Sol or G should be played with finger number 5 and the middle C with finger number 1 or the thumb. The ending is a Sol-Fa-Mi-Re-Do played with descending fingers 54321.
     
Turtle Shells
Did you know that intervals can be played ANYWHERE on the keyboard? Any two keys right next to each other are a 2nd, skipping one key creates a 3rd and skipping two keys creates a 4th. Ask them to play for you a 2nd, 3rd, 4th or 5th (skipping three white keys) anywhere on the keyboard. They are pros at this!


skills_video.pngHow to Play the Yellow Chord


BEEF, it’s what’s for dinner! Our new puppet show comes from a ballet named Rodeo written by Aaron Copland. Enjoy learning more about the composer and watching some excellent choreography while listening to the 4th movement of this ballet, Hoedown. Yee Haw!


And because we're playing "Row, Row, Row Your Boat" now, here's a couple fun videos of just how fun it can be to CHANGE a few things about it!

https://www.youtube.com/watch?v=wY9O4M8DS7c

https://www.youtube.com/watch?v=fsESxOwASuw


Green Turtle Shells #9

Wednesday, April 30, 2025 | Green Turtle Shells Lessons

2nd_year_header.jpgred_balloons_parent_note_heading-1.gif

Lesson #9


Thank  you, parents for coming to class this week! It is so fun to watch you bonding with your children through music! 


rh_yellow_chord_placement-2.jpg

Remember to place the yellow stickers on your keyboard. (See image for placement!) Now that your child can play the yellow chord, there are more songs they are able to learn! Practice time will increase up to 5-10 mins. Adding this chord can be tricky for most students. If you find your child struggling, continue doing the Bubble Hand Exercise to strengthen those little muscles. Our goal is to eventually be able to switch between red and yellow with our eyes closed! If you would like to write finger numbers on the stickers, feel free! Just be sure you have 13and 5 for the red chord and 12and 5 for the yellow chord! Also, be sure your child is only moving their thumb and leaving the rest of their fingers "glued" on the same keys. This will help them to switch between chords more quickly and easily.


IMPORTANT: If you have ANY questions about ANY of the things we're working on, PLEASE ask! I know a few of you are experiencing learning these concepts for the first time, right along with your child! So if you don't understand something, PLEASE let me know! You can't help your child with something you are confused about yourself! I'm happy to help! (For real!)
      
Celebrate Connection     
A few ideas to bring playfulness to practice time!

  • Sing along in a baby voice.
  • Start at the bottom of your assigned song list and work your way back to the top.
  • Put a small mirror on your piano music holder and sing to the person in the mirror.


Kit Kat Keyboard
Breaking the keyboard into 2 separate groups will aid the students in creating a mental image in their brains and prevent "counting up." Do not let your student get in the habit of counting up...it's a hard one to break! For now, we are experiencing these groups of 2 and 3 and we will solidify them in Yellow Arrows. Knowing by sight is the goal!


Echo Edna
Edna helps us with our sight reading! We're starting out slowly. Next week, we will introduce the 2nd line. We want the kids to "first LOOK, then THINK, then SING, then PLAY." Going in that order will ensure maximum success the first time they play something. 


Chords in Pieces
Chords in Pieces are simply each block red, yellow or blue chord BROKEN into 3 separate pieces or notes. The 3 notes of each chord can be in any order and they remain the same color chord, just rearranged in different patterns. For example the red chord can be rearranged in pieces of Do-Mi-Sol, Mi-Sol-Do, OR Sol-Do-Mi! All of these arrangements are still the red chord. This is the same for the blue and yellow. 


Though the 3 notes of a chord can be in any order, for simplicity’s sake, the position we are learning throughout 2nd Year is this very common position. Later, we’ll learn the other position of these chords. The great thing is that ALL the chords, whatever position they are in will be in either the snowman, top-heavy, or bottom-heavy position that the children are learning to play now. The shapes are important for knowing which fingers to use! 

Row, Row, Row     
As you’re ROWING along this week, keep a slow and steady beat to really SINK in the Yellow Chord! To prepare to play the Yellow Chord, remind your child aurally and visually that only the thumb (#1) slides over to the next key. All other fingers (2, 3, 4, 5) stay put, lightly resting on the keys. As long as those fingers stay put, the hand has an anchor and the child knows where he is on the keyboard, even without looking. Our goal is to keep all of the fingers in contact with the keys, so they will be ready for quick transitions.     

Bubble Hands     
Going through all the verses of this song make a great warm-up each time your student sits down at the keyboard. This one is best to do WITHOUT the soundtrack so you can double check all the posture elements with the first verse, without rushing through it. Be sure to land the right hand with the thumb on Middle C. Then go through all the finger numbers in order once, singing the note that's being played: "Here I Am. Here I Am." 
Then randomly call out finger numbers to help them memorize them. This is an invaluable exercise. It reviews finger numbers, and strengthens fingers as well as promotes independent finger movement. As the children play chords and single notes, they most likely will not be able to keep a bubble hand. This is the ideal – the goal to work toward. As long as the child can form bubble hand in C position, we are on the path toward the goal. Good Bubble Hands will help chords to be easier to play!


Hoedown     
hoedown.pngIn the back of the piano book you'll find the "Hoedown" coloring pages. Turn on the puppet show music and have your child color while they listen. Or you can download extra and print out the fun coloring pages from your student download portal. You can do the mini puppets or the coloring book, or both! (Let me know if you have any trouble downloading these!) 


All chords can be played block (notes together) or broken (notes one at a time). Learn more about the different ways to play chords


 Using the Student Magnet Board and 2nd year Student Magnet Set, you can build the chords block and then break them apart into broken chords.


Practicing rhythms can be fun! I have made my "Rhythm Foods" game available on the student download portal! If you haven't downloaded and played it yet, it's lots of fun! I'd love to hear your experience with this game!


Here is a link to all the skills videos as well as the link to be able to purchase a class video to make up for a missed class. (tap or scan)


Green Turtle Shells #8

Wednesday, April 30, 2025 | Green Turtle Shells Lessons

2nd_year_header.jpgred_balloons_parent_note_heading-1.gif

Lesson #8


 myzelleqrcode.png

Next week is PARENT WEEK and tuition is due for those of you paying monthly! You can scan the QR code to the right in your banking app to pay via Zelle (or just use my phone number).


The children will be coloring in their piano books! It's completely acceptable and we will color more in class!      
       
Celebrate Connection      
A few ideas to bring playfulness to practice time!

  • Play the first measure of a song, *piano* and the next measure *forte*, the next measure *piano*, and the next, *forte*, etc.
  • Video record (or voice record) a song and send it to your LPM teacher (or Grandparent!).
  • Have parent sing words while child plays.


Primary Chords Song
Do you want to build more snowmen? Combinations of intervals build chords. We will use ‘snowmen’ to teach the 3 common shapes of chords throughout the 2nd year of Let’s Play Music.
       
A ROUND snowman shape represents the Red Chord built with two stacks of 3rds. (The SNOWMAN lives at HOME)
A TOP-HEAVY shape represents the Blue Chord built with a 4th on the bottom and a 3rd on the top. (The blue kite flies UP HIGH in the blue sky.)
A BOTTOM-HEAVY shape represents the YELLOW Chord built with a 3rd on the bottom and a 4th on the top. (The yellow sand we're collecting on the GROUND is HEAVY.)


We can find melodic patterns in many songs! You can click and print this melodic pattern card and have your child point to the corresponding melodic pattern they hear in the following songs.


Sol-Fa-Mi-Re-Do: Dings in Firetruckend of Row, Row, Row Your Boat, end of Bunny's Birdhouse
       
Mi-Re-Do: Solfege Seafriends: end of octopus line, end of Farmer in the Dell, end of Sally Go Round the Sun
       
Sol-Sol-Do: Solfege Seafriendsend of whale line
       
Sol-La-Ti-Do: Say, Say Oh Playmate: ending


For additional fun, you can go to your Student Portal and download the melodic pattern flashcards. You and your child will become pros at hearing, singing, signing, AND playing them! Here are the patterns in some of the songs we are learning this semester.

I have added the SFMRD pattern cards to the student download portal. It's called "SFMRD_addition". You can add those to your first set of cards from last year.


If you didn't downloaded those yet, just download the one called "5_melodic_patterns_game". It will have all 5 melodic patterns in one file.


Play "Memory" with them. ANY cards that have the same pattern are considered a match (see photo for examples of matching cards). Have your child sing and/or sign each pattern as the cards are turned over, even if it's your turn! Or just mix them around face-up and see how quickly you can pair them with each other. Then do it again and see if you can beat your time!


Green Turtle Shells #7

Wednesday, April 30, 2025 | Green Turtle Shells Lessons

2nd_year_header.jpgred_balloons_parent_note_heading-1.gif

Lesson #7


Great playing this week!! I loved seeing C position, Firetruck dings, and red chords! We even listened to the minor chord! Isn't it scary??? And guess what? Our students can now recognize all of the Red (snowman)Yellow (bottom heavy) and Blue (top heavy) chords in notation, and it won't be long before they play them, too.  
     
Don't forget to listen to the Green Turtle Shells 
class music and let your children play along to the accompaniment tracks! (Numbers given below). Thank you so much for your diligence at home! Your children are progressing nicely! Thanks for the sacrifices you make at home and getting them to class! It is worth it!  
     
Celebrate Connection     
A few ideas to bring playfulness to practice time!
 

  • Put sticky notes over sections of the song and number each sticky note 1-6. Roll a die and remove the sticky note of the number shown on the face of the die. Play that section. Repeat, and play all measures that are uncovered. Continue until all stickies are removed and play the whole song.
  • Hold a funny face throughout the whole song, then switch with your parent.
  • Sing the melody of a song while pointing along to each note (you can do even do this laying on the floor or couch).


Three Blind Mice (track #26)  
We can play a Mi Re Do! How fun to be able to play along with the accompaniment tracks! This repetition is great for strengthening fingers, and training ears to hear a melodic ostinato! Make sure they are singing along and playing with the accompaniment tracks to make this even more valuable. If you or anyone plays the guitar, or ukulele, have a jam session and sing along!  
     
Turtle Shells (track #20)  
It’s important to understand that a 2nd does not have to always be a C and a D. Any two adjacent white notes are a 2nd. The same thinking goes for 3rds (skip one white key) and 4ths (skip two white keys). Knowing how intervals look on the staff, how they are spaced on the keyboard, and how they sound when played is invaluable ear training and staff reading knowledge!  


 You can reinforce building "turtle shell" intervals all over the staff by making intervals with black notes on the Student Magnet Board.  


skills_video.pngHurry, Hurry, Drive the Firetruck


skills_video.pngThree Blind Mice w/ Mi, Re, Do


skills_video.pngSolfege Seafriends Notation & Harmony


Check out this musician playing Three Blind Mice in a round. What beautiful harmony. You can create harmony at home by playing "Three Blind Mice" together. One person plays the MI RE DO ostinato and the other plays the chords. Don't forget to sing.


Here's a great, quick video from our Making Musicians Blog on using "laser beam eyes" while following the notes on the page as you play! The goal is to keep our eyes on the book rather than our fingers which helps draw the correlation between what is written and what is being played.


Green Turtle Shells #6

Wednesday, April 30, 2025 | Green Turtle Shells Lessons

2nd_year_header.jpgred_balloons_parent_note_heading-1.gif

Lesson #6


I have a personal goal for every student to master the skills taught this semester and parental support is the key to success! Completing their homework book activities is the best way to help them master these skills. Even if they only get it out once a week, that's still better than not at all. If you need to break it up into small chunks and do just a couple minutes of one activity and a different activity another day, that is totally fine. 


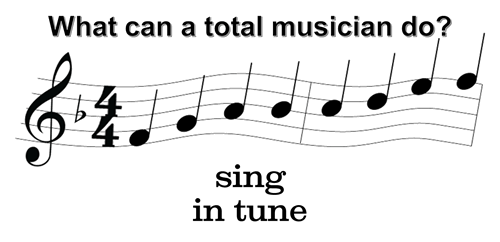
At-home practice is an essential ingredient in the recipe for making a total musician. The visual, aural and finger skills we will be learning require repetition. We are aiming for 5 practice times a week. Try to find a calm, uninterrupted time of day to sit with your child and assist with practice. You can help by pointing to the chords and notes in the book, singings along and giving a lot of praise for their effort.

Celebrate Connection   
A few ideas to bring playfulness to practice time!

  • Stand on one foot while your parent plays a song, then switch.
  • Pretend the keys are hot for one song.
  • Play "air piano" style by playing on the piano cover or with the keyboard off.


Bubble Hands

Playing along with the Bubble Hand song on the CD is the perfect opportunity to encourage your child to keep the bubble hand shape while they push down other fingers to play as well as reinforce finger numbers. Once they MASTER finger numbers in order, switch up the finger numbers in the 2nd verse. A fun way to extend this activity is to "write" the finger numbers on their fingers with marker OR “write” the finger numbers on the tops of the fingers on a latex glove which they wear while they play!


Turtle Shells

Speaking of finger numbers, your Turtle Shells discovered that intervals are played with specific finger numbers. A 2nd is played with fingers 1 & 2, a 3rd is played with 1 & 3, and a 4th is played with 1 & 4. Remember “Thumbs are ONES!” The bottom note of every interval is a middle C. It is the most important note because it has its VERY OWN line!!! 


 You can build "turtle shell" intervals from middle C with the Student Magnet Board and 2nd year Student Magnet Set.


Firetruck

Hurry, Hurry we learned to play a Sol-Fa-Mi-Re-Do! For practice play the song on the CD and let them 'dance' in their seat, then get in C-position and play the ding ding ding part. On each verse alternate between singing the solfege, the finger numbers, ding dings, and even "baby steps go-ing down."


Find out why intervals are worth knowing.


Come on an adventure with Turtle Tom and Turtle Tim as they encounter the sounds of intervals!! (Totally worth looking at this!)


Green Turtle Shells #5

Wednesday, April 30, 2025 | Green Turtle Shells Lessons

2nd_year_header.jpgred_balloons_parent_note_heading-1.gif

Lesson #5


myzelleqrcode.png

Thank you for coming to class this week and having fun with your child. They love having you there to cheer them on!


Just a reminder, if you are paying monthly, tuition ($75) is due this week. You can scan the QR code on the right with your banking app or use my phone number to pay via Zelle. You can still pay me with Venmo, I just have to pay transaction fees that way.


The kiddos are quickly learning the keyboard basics and moving right along quite nicely. You may be yearning to hear your little one playing beautiful pieces, but remember, this is not just a piano course. We are learning harmony, ear training, singing, and classical music. In time, it will all come together in a more complete and satisfying way than just playing a piece. Enjoy this journey with your child!


I have noticed that the red stickers on the back of the books are still on some of your children's books, which means they aren't on your keyboards at home! Please be sure you use the stickers (which are just electrical tape and should be easy to clean off when the time comes to remove them!) to help your child feel confident with the red chord. We'll be adding another chord soon and they should be confident in playing the red chord before then. Please let me know if you have any questions about placement.


Celebrate Connection      
A few ideas to bring playfulness to practice time!

  • Play one song an octave lower
  • Play a song at T - U - R - T - L - E speed
  • Play for your favorite pet or toy


Need some fun practice ideas? Log in to your Student Portal and download "Practice Fun Cards"!


DO is Home
In Blue Bugs, when we sang “DO is Home,” we were singing middle C to develop relative pitch. The students will be playing the piano this year in the key of C, so we want them to know the name of this note. We also experience and want to instill in them that DO can change and isn’t always middle C.


Kit Kat Keyboard:
Playing all the C's and then all the F's as fast as we can builds our spatial awareness of the keyboard (octave spacing). As the students form visual conclusions about the keyboard layout, they will become comfortable distinguishing all the white keys and developing a feel for the keyboard spacing. By playing all the C's or all the F's as fast as they can, they gain a feel for how far apart each letter key is from the next key of the same letter (an octave). Mix it up later in the week by racing the song up the keyboard, or racing down the keyboard. Suggest they look at their fingers, then look away or even close their eyes!
       
Old Paint
As your child plays this song, you can help them get a feel for which fingers need to go down by pressing the back of the keys while their fingers are in bubble hand shape. If the child is struggling with this or any song, the best way to assist is to press the correct key down at the top of the key near the soundboard. This way, we won’t interfere with the brain trying to send a neural message to the hand.


Sol Fa Mi Re Do
“Who sits on your SOL-FA? MI and RE eating cookie DO!” A catchy phrase to remember the new melodic pattern we are learning. Our big goal is to HEAR and Recognize and also to SEE and Recognize and PLAY the melodic patterns. We will begin playing Sol Fa Mi Re Do next week!


 Using the Student Magnet Board and 2nd year Student Magnet Set, you can build this new melodic pattern with black note magnets.
       
Sally Go Round
This is a fun game to play at home! Emphasize all landing together on BOOM! We are discovering kinesthetic energy, the energy of movement in time. Children have to learn to predict when they need to jump in order to land exactly on the BOOM, just as they need to be able to predict when to lift their hand to play the chord exactly on the beat. This game takes this skill to a full body involvement level.


skills_video.pngHow to Play Intervals w/Right Hand


We are training the ear to hear layers of sound with the aquatic canonSolfege Seafriends. By studying each individual part, we will be able to hear them distinctly even when they are played together. This is a great skill that even most adults don't have! (Page 73 in the reference section of your homework booklet shows which sea animal goes with which musical part.)


Check out this fun example of a canon.


Here is a link to all the skills videos as well as the link to be able to purchase a class video to make up for a missed class. (tap or scan)


Please text to let me know your child's favorite Green Turtle Shells song so far! That way I know you've read this newsletter!


Green Turtle Shells #4

Wednesday, April 30, 2025 | Green Turtle Shells Lessons

2nd_year_header.jpgred_balloons_parent_note_heading-1.gif

Lesson #4


myzelleqrcode.png

Next week parents attend and tuition is due for those of you paying monthly! You can scan the QR code to the right in your banking app to pay via Zelle (or just use my phone number).


When you come next week, you can make class especially great by arriving a few minutes early to get your child settled at the keyboard, and throughout class encourage your child, praise them for the wonderful progress their little hands have made (hugs, DO bonks, high 5's, etc.), participate in all of the activities, and HAVE FUN!!!


Celebrate Connection   

A few ideas to bring playfulness to practice time!

  • Roll one 6-sided die and play Kit Kat Keyboard or Old Paint that many times
  • Sing along while you play Old Paint in a British or Australian (like Bluey!) accent
  • Run across the room and give your Mom or Dad a hug or a high five (or hip bump) after you finish each song 


White Keys 
This week we reviewed anchor notes C & F in class with the 2nd verse of Kit Kat Keyboard. Play a quick game of “Show Me a _______” (LOW F, HIGH C or a MIDDLE C, etc.). This will help cement these white anchor notes as well as review keyboard geography!

Red Chord
Do you want to build a snowman? This year, a red chord will always be stacked up nice and neat like a snowman with two stacks of 3rds. Enjoy drawing rounded snowmen for the theory this week!


If you have the Student Magnet Board and 2nd year Student Magnet Set, you can build your own snowman shaped red chords.


Old Paint
Now that we know how to read and play a red chord we get to play our favorite Old Paint! When you sing together exaggerate that down beat: good BYE, old PAINT, I'm LEAV-ing Chey-ENNE. Mix it up singing in a cowboy voice, an opera voice, in a video for grandma! SING ALONG as your child accompanies you both feeling the steady beat and hearing beautiful harmonies all at once!


Our first puppet show this year has been renamed “Spring Bees” for the sake of Let's Play Music's story line. However, its real name is "Spring" and is from a set of four violin concertos called, The Four Seasons composed by Antonio Vivaldi. What is your child’s favorite character? Can they hear the loud (forte) and soft (piano) within the themes? Which themes are major and which ones are minor? Have you made the puppets yet? If you want more, please let me know if you have any questions about how to download it. The kids LOVE being able to do the puppet shows at home so they can be ALL the characters!


Green Turtle Shells #3

Wednesday, April 30, 2025 | Green Turtle Shells Lessons

2nd_year_header.jpgred_balloons_parent_note_heading-1.gif

Lesson #3


red chord with right handYour keyboard will now look like this!

We can play a red chord now! Help your little piano players remember which fingers to use by using a red marker or nail polish to put a red dot on their right fingernails on the THUMB (finger #1), MIDDLE FINGER (finger #3), and PINKY (finger #5). These are the finger numbers that are used to play the RED chord. Put the RED stickers on your piano at home and match the dots on their fingers with the stickers. They’ll be ready to play Old Paint next week in class! Be sure they are using the correct fingers EVERY TIME they play the red chord! 


Skill of the week: red chord with fingers 1-3-5, ROUNDED like a bubble, fingers flat are trouble! Build a good habit from the beginning and it will be so much easier! Can your child play a red chord on ALL the C's of the keyboard?


Celebrate Connection     
Here are some ideas to bring playfulness to practice time!
  • Sing Old Paint with a western accent.
  • Kit Kat Keyboard: With the stopwatch on Mom or Dad's phone, time yourself (and Mom or Dad) to see how fast you can play ALL the C's! Now all the F's!
  • Primary Chords: When you play the red chord this week, sing, "Red" each time your play it. Then try singing red in a different language: French "rouge," Spanish "rojo," Japanese "aka." 


Kit Kat Keyboard
Now that we know the black keys ‘sol’ well we are ready to master the white keys! Notice that the grouping of the black keys influences the grouping of the white keys. It is important for them to look closely and frequently at the keyboard in the beginning to reinforce keyboard geography. When they are hunting for those C's and F's refrain from giving too many verbal cues- or talking too much. Just keep chanting the key phrases "find a group of 2 down one is C" and "a group of 3 leads to F Yippee!" and saying, "look again" "does that look right?"


If you have a student magnet board, can you find the two C's and the two F's while you do the chant?

C Position Chant
We learned ‘C POSITION’ this week which means our right “Thumb’s on Middle C and a finger for each key!" When we are in ‘C Position’ each finger is assigned to play the note it is sitting on. We will sing this chant A LOT in class! This week we practiced floating our bubble hands over the keys and then letting them land on ‘C Position’. Continue finding C position at home.


Don’t feel frustrated if it’s tricky for your child at this point to press down ONLY the 1,3,5 fingers… we’ll keep strengthening those fingers and soon it will be easier. Learn how muscle memory works when learning to play the piano and why is it soooo important to emphasize that correct fingers are used when learning chords from the very beginning! Practice makes PERMANENT, not perfect! Perfect practice makes perfect!

IMG-9117.JPGFinger Numbers Matching Game

I've added a fun matching game to the download area on my website! Go to 

www.musikandme.com and click "student login". Once you are in the Student Portal you can go to Online Resources > Let's Play Music > 2nd Year, and download the "Finger Numbers Matching Game". It's very simple: print both pages, glue thicker paper to the back (if desired), cut out all 20 cards, and play "Memory" with them. Laminate them if you want, or simply print on business card paper and tear apart. This game is most effective if you have your child say out loud what each card is AND wiggle the proper finger, as EACH CARD is turned over, even when it is not their turn. If they seem overwhelmed, just remove all the left hand cards and start with just the right hand. Feel free to sing the appropriate parts of the 3rd verse of the Bubble Hand song as you play the game: "Where is one? That's your thumb!" My daughter LOVED this game when I created it for her a few years ago and it really helped her learn the finger numbers in a fun way! Another suggestion for a super quick game is to simply mix all the cards face up in a pile and have your child pair them all together! Then go through each pair saying what it is and wiggling the correct finger. The key is to JUST HAVE FUN!!! Please let me know if you have any questions about this or anything else! I'm here to help!


Green Turtle Shells #2

Wednesday, April 30, 2025 | Green Turtle Shells Lessons

2nd_year_header.jpgred_balloons_parent_note_heading-1.gif

Lesson #2


Just a reminder, students DO NOT need to bring bubbles to class. I have a set for the class to use. You can keep yours next to your piano at home. 


If you haven't yet sent a side picture of your child at the piano or keyboard, I need that ASAP! We don't want the kids to get into bad habits, so we're going to do it correctly from the beginning!


Our reward system for class is this: Each child has a treasure map with a turtle and they get to earn stickers for being on time and completing both parts of their homework (it must be signed or they don't get a sticker!) Also, they can earn a star for not playing their keyboards when they aren't supposed to. So they can get 4 stickers every class! Each time they get to the dark circles on the map, they get to pick a prize out of the treasure box!  


Our skill of the week is recognizing which side is high and low on the piano. Quiz them by asking them to play a group of two (or three) up high or down low or in the middle of the keyboard.     


Celebrate Connection      
A few ideas to bring playfulness to practice time!

  • Play Kit Kat Keyboard with your elbow!
  • Lay on the floor (or upside down on the couch) to when you hold your bubble and wiggle your fingers as you sing along with the Bubble Hands song.
  • Play Say, Say, Oh Playmate with your family or teach some friends! Don't forget to use the CD while you sing and play!


Echo Edna 
 Edna will teach us how to sight sing and sight read. Ask your child about what Edna did in class today.  

Kit Kat Keyboard
If you have a digital keyboard at home, discover the fun, groovy beats to chant and play Kit Kat Keyboard with!      

Bubble Hands
This week we learned our fingers have numbers. When they do their bubble exercise, ask them to wiggle their 3 finger, their 5 finger, etc. This exercise is important for finger strength and dexterity.


In Let’s Play Music we learn that intervals are Turtle Shells! An interval is the distance between 2 notes. 


 Do you have the student magnetic board yet? You can make different intervals with your own magnetic turtle shell notes! Order your own Student Magnet Board and 2nd year Student Magnet Set.


Learn more about the importance of melodic and harmonic intervals in learning how to read and play music here!

Green Turtle Shells #1

Wednesday, April 30, 2025 | Green Turtle Shells Lessons

2nd_year_header.jpgred_balloons_parent_note_heading-1.gif

Lesson #1


Welcome back from summer! I'm so excited to begin 2nd Year: Keyboard Time


This is the practice process for this year: Here at the beginning, practice only needs to take as little as 2 to 5 minutes, 5 times a week! The goal is let your child get the idea that sitting at the keyboard is brief and pleasant.

Remember that listening to the class music often is part of the weekly practice assignment and will enhance your child's learning process: Listen, Listen, Listen to the music. If you need help getting the Let's Play Music app to work, start here. Remember, you will use the same login information you used when you registered for class.     
      
Remember to text or email me a picture of your child sitting at the piano with proper posture.

myzelleqrcode.png

Tuition is due today and is $280 for the Green Turtle Shells semester. You can pay via Zelle using my phone number (preferred, so I don't have to pay Venmo transaction fees). Zelle is a way to transfer money from your bank account to my bank account without needing to wait or pay extra fees. It's easy to set up through your bank and even easier to use once it has been set up. You could pay via Venmo @musikandme if you really can't set up Zelle. If you need to make monthly payments, rather than paying for the semester, it will be $75/month. (You will save $20 by paying for the semester up front!) 


Celebrate Connection
Think of ways you can focus on making practice time as fun as possible – give your child warm, friendly eye contact, smile with your voice, be a little silly, show you are relaxed and happy to sit with your child, and look for the good in your child's effort. Notice the joy in your child's eyes. Verbalize the good you see and hug your child often. This is the beginning of the practice relationship that will be essential to your child's success in Let's Play Music. The more you invest your energy into positive interaction, the more solid and successful this habit will become.     
      
After doing your assignment for class, allow your child to fool around and experiment if he wants to, and play a song you know -- no matter how simple. This can be done anytime or multiple times throughout the week. Model joy as you play the piano. If you make a mistake, smile and show that you are relaxed and enjoy trying again to fix the mistake. Celebrate your effort to give him the idea his efforts are something to enjoy and celebrate.


DO is Home
Just a reminder to put one RED STICKER on Middle C (Do is Home) this week on your piano or keyboard. See the graphic below for clarification. 
If you are still unsure which note is Middle C, please let me know! It should sound just like the large red bell in your bell kit. Each practice time should begin with THINKING OF middle C, then SINGING it, then PLAYING it! This will continue to strengthen the goal for each student to acquire relative pitch.

Kit Kat Keyboard

The first thing we will focus on is the black keys. The first verse of this song emphasizes the black keys in groups of 2 and 3. The white keys for now, are just the background to the ‘picture’ of the black keys. Dividing the keyboard this way helps build keyboard geography in our minds: a mental image formed from visual conclusions. As we look, study, and play at the keyboard, a mental map is formed. Use the entire hand to see, feel, and hear the black keys! It’s important to remind students to say out loud “2” and “3” as they practice. The more senses we use at once, the easier it is to retain and recall information.  

Bubble Hands

The 1st verse of this song is all about proper posture for piano playing. Be sure to begin each session of practice with this song. It will get easier the more your child does it.

The second verse is all about proper finger shape. Practice with the bubble to build finger strength and good form. Finger numbers will be emphasized more next week, so don't worry about the 3rd verse yet. For now make sure their elbows are close together and their fingers are aligned with each other, spread apart and not overlapping. The technique that happens in class is important, but reinforcing it at home is even more influential! Please send me a picture of your child sitting at the piano with proper posture this week.   

Spring Bees

We have a new fun puppet show! You and your child can also perform it at home. Look in the back of the piano book and you'll find the "Spring Bees" coloring pages. Turn on the puppet show music and have your child color while they listen. If you'd like to laminate the puppets and put them on sticks, I have a laminator and I only charge barely more than the cost of the laminating sheets.


We're so excited to have our parents participate in class with us! Check out some terrific ideas to make the best of your Let's Play Music experience in the classroom and at home with your child!


bee.png

Also, I've added the Spring Bees Coloring book to my student portal if you want to print additional copies. Log in at www.musikandme.com and you can download and print these two pages out and let your child color the characters as you discuss their favorite part about the puppet show! (Don't forget to listen to the music while coloring!)


 Have you wished that you could have your own staff board and magnetic notes at your house for your child to work with? You can! Order your own Student Magnet Board and 2nd year Student Magnet Set.


Here is a link to all the skills videos as well as the link to be able to purchase a class video to make up for a missed class. (tap or scan)